Reeth
Scale 7,
Owner – Simon Caygill
Dimensions – 30ft x 3ft
Control Method – DC/DCC
The Story of Reeth, my Scale Seven layout.
Background
This is not the story of Reeth the village in North Yorkshire, which can be found here:
https://en.wikipedia.org/wiki/Reeth
But of my interpretation of what might have been if the Richmond (North Yorkshire) branch line had been extended further up the dale to support the lead mining industry. I have spent a lot of time in Swaledale and loved the area, so it made sense to think about building a model railway in this setting, at some point.
My modelling experiences had previously been strictly OO. As I am sure many people do, my Dad had some model trains, had started to build a layout in the loft, which I think we did manage to finally complete a circuit, maybe not. I moved away from home and continued along the well-trodden path of OO.
After some years I found myself in Basingstoke and a member of the Basingstoke and North Hants Model Railway Society www.basingstokemrs.org (yes the famous Basingstoke Bodgers, but I had moved on before the Model Railway competition was on TV). We were meeting in an old scout hut working on one of two layouts, one Lulworth in OO and the other… N iirc. The club was looking to build a new layout with 7mm to be the scale, although gauge was yet to be decided. Having no experience of the bigger scale I was happy to get stuck in. I had said I was not that interested in building track, and bought a van kit, an GCR 10ton Sliding door van. At the same time, I became friendly with one of the club members, who was building a layout for someone, in Scale Seven. Mr B introduced me to building track for this GWR layout, I still had no interest in building track, but helped as I was between jobs for a while.
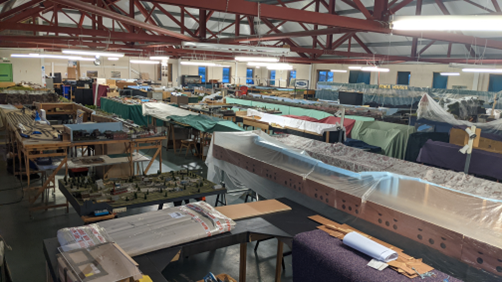
Soon after this, back in 2012, I moved back up north, with work. Having found the camaraderie within the model railway club something I enjoyed, I found a new club to join, this being the Blyth and Tyne Model Railway Society www.btmrs.co.uk. As a new member I was asked to help with one of the OO layouts (Haventacloo), but had a desire to build something for myself, in 7mm… I do not want to blow the trumpet too much of the club, but we have one of the best club rooms in the country, 10,000sq’ of space and this allows for not only multiple club layouts, but space for members to build something…
If I wanted to build an exhibition layout then I needed a proposal approved by the committee, then sitting in the queue waiting for some space to be allocated.
During this time, I was having conversations with myself, about scales and gauges. I had come to terms with wanting to build a larger scale layout, I had bought some O gauge points and flexitrack, but was still not completely convinced. This was a time when there was a lot less R-T-R rolling stock, so I was going to have to build all of this. If I am going to why not build it right, this would then need me to build the track that I had not interest in. But the Mr B’s track looked so good, compared with Peco track… I threw a track plan together, total length was to be 24’ including Fiddle yard… But still, Peco or hand built??? Eventually I decided to do the best I can, which meant Scale Seven. I submitted my proposal.
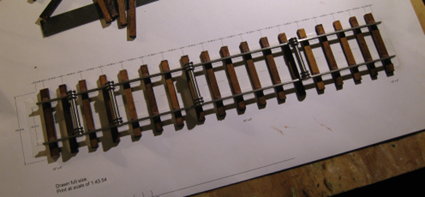
While waiting for space I started to follow the guidance I had received, my thought process, not yet having approval, nor the space was to build some simulated 45’ sections of track to give me something to put down quickly once I built the first board. I drew the sleeper layout at the correct spacing in CAD and printed the plan. I layout some double sided tape and laid out the sleepers, on to this I slide chairs onto the rail and glued. I built about 12 sections, while doing other modelling at the club.
Eventually my layout was approved, and space was allocated.
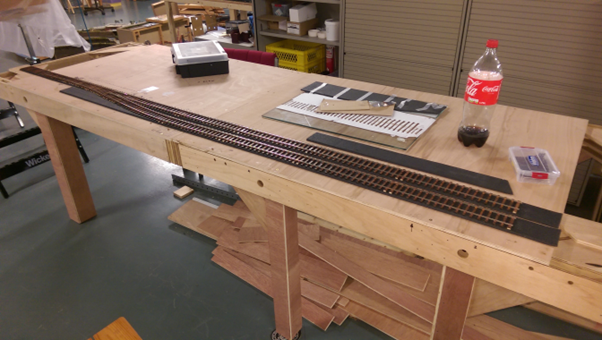
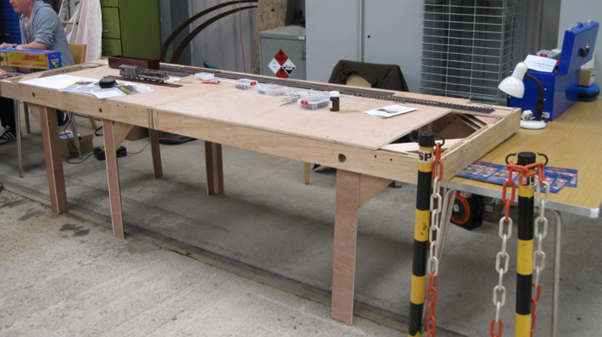
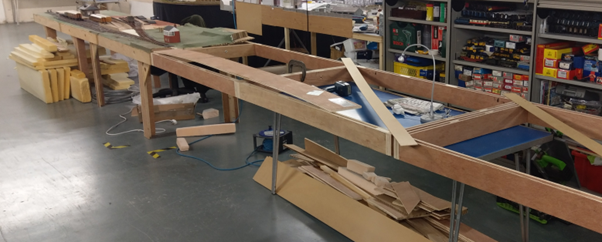
Baseboards
Having seen the effort needed to setup and breakdown an exhibition layout I wanted to make sure the structure was solid, but as light as possible. I chose to build from a sandwiched plywood structure, with plastic pipe legs. In this picture you can see the corner bracing has holes, the plan was to make H shapes from domestic pipe (they should be light and still have enough strength.
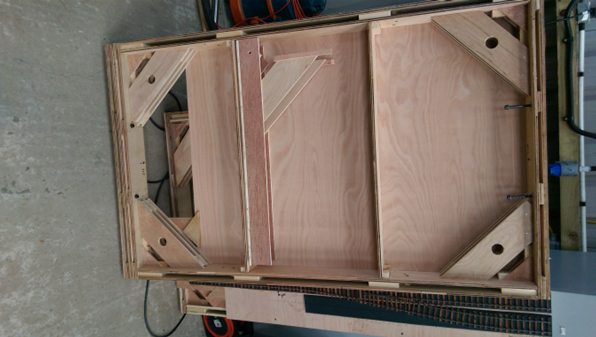
Well, that did not last long once tried as there was too much slack, and therefore wobble. The pipes were disposed of. Back to the drawing board. Not wanting to remove the corner bracing I needed to rethink the legs. I built them from two pieces of plywood glued and nailed to a piece of inch x inch of softwood with a bracing piece that sits on under the corner bracing shown in the above picture. Each leg has one bolt. The layout is quite solid. The next picture shows my queen board with four legs that the boards then hang off of. But there is a new plan for legs, to be shared later…
The track bed would be of plywood also, with the rest of the top open.
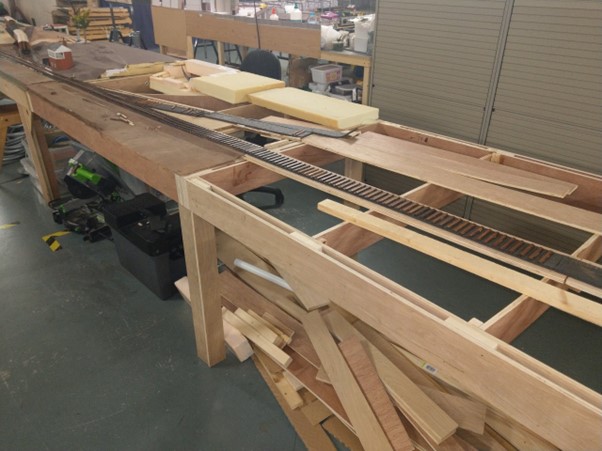
This allows me to build both positive and negative elevation, although cross members can get in the way. The first two boards were built which would host the branch terminus station.
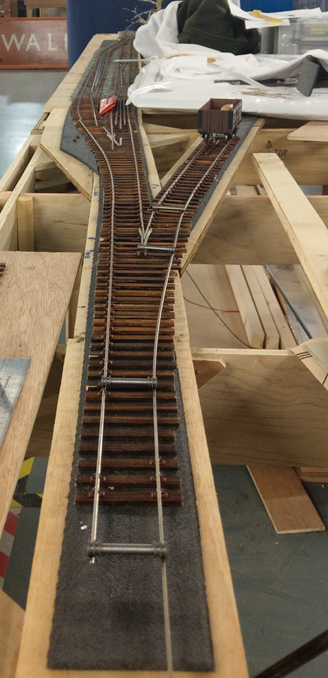
Track laying
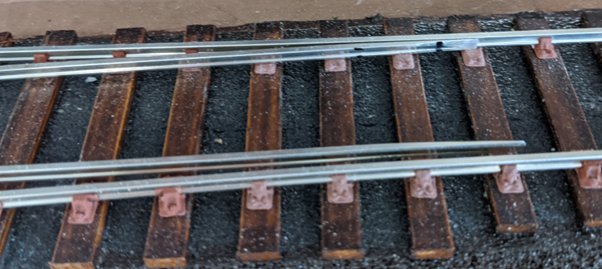
Having had some good experiences with using foam underlay in the past, I chose this over cork and got to work ‘throwing down’ my sections of track. But I needed a point in place. I am not a fan of sticking track plans down and building on top, as this seems to defeat the object of the underlay in dampening down the rolling noise of rolling stock. I managed to print out a point layout from Templot, then cut out the sleepers. This allowed me to lay the point template and glue the lime sleepers, stained with two coats of dark oak varnish directly to the underlay, through the holes.
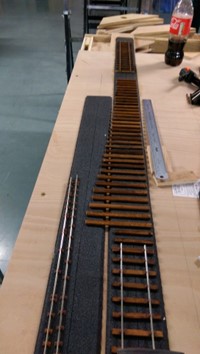
I had bought the gauges from the Scale Seven society stores, along with the filing jig and assembly jig and back to back gauges. Following the S7 guidelines I started filing, and soldering.

I then laid the straight rail through the point to give a datum to lay the common crossing. I then could build the diverging rail off of the common crossing. It made sense to me, and actually worked well.
In the mean time I had built my first piece of rolling stock, a Peco GWR 6 wheeled guards. Yes I know that would never have made it to a pokey branch-line in the north of gods own country, but it was for the S7 competition that year (2013 or 2014 maybe). I thought I had done a great job, and am still happy with what I produced.
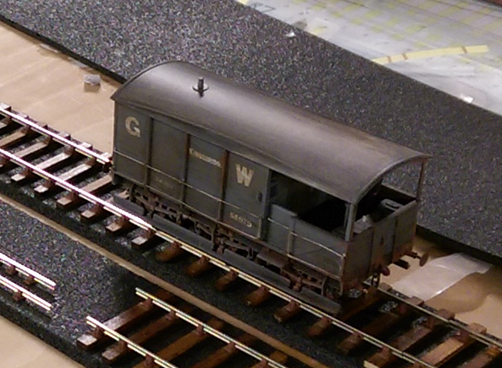
This digression is important. I had be ‘ridiculed’ in the club by some members with statements like ‘its not worth all the extra effort to build that dodgy gauge’, ‘it’ll never run’, etc. But they are absolutely WRONG.
Once I had built the first point as outlined above (no blades at this time) I pushed my GWR Guards Van through the common crossing that I had filed and soldered, and by did the hairs on the back of my neck stand on end, the motion was smooth, no clunking down the chasms like in Peco points. I knew, at this point I had made the right decision. The track sections with looking good and I had build something I was proud of. This picture shows the point partially finished and the sections of track in place.
Exhibitions
Yes, we are not done, hardly started really, but I offered to take my first couple of boards to the Aln Valley railway exhibition in 2015. It gave me a weekend of modelling so off we went. The progress was well received, and people were interested in what I was doing.

BTMRS have an open weekend in December every year that co-insides with the Christmas market in North Shields. As I have had space for some time the progress of Reeth has be viewed by members of the public, some come each year to see this progress, some years more than others.
Progress
My modelling process is a bit scatter gun. So I have track being laid, and some ballasting had been done, but other things were needed as well.
On returning home one evening I noticed a neighbour had a skip on their drive that has a load of Celotex off cuts. Before, even going in the house to say hello, I was knocking on the door asking if I could take the Celotex. With permission, I took this and stacked it in the porch before SWMBO was aware and could put a stop to my skip diving. It was not long before the instruction to move the mess was given, so I took it down to the club and stored it under my layout. This gave me a new focus, landscaping. I had also started to build another couple of boards.
Starting Scenery
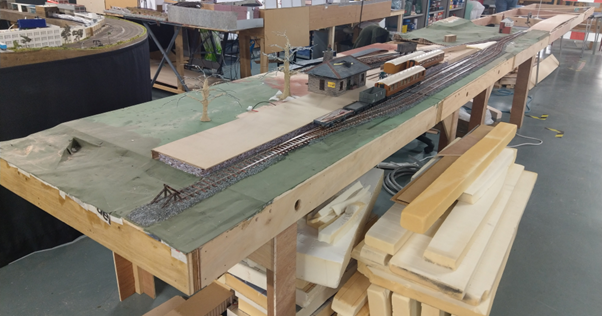
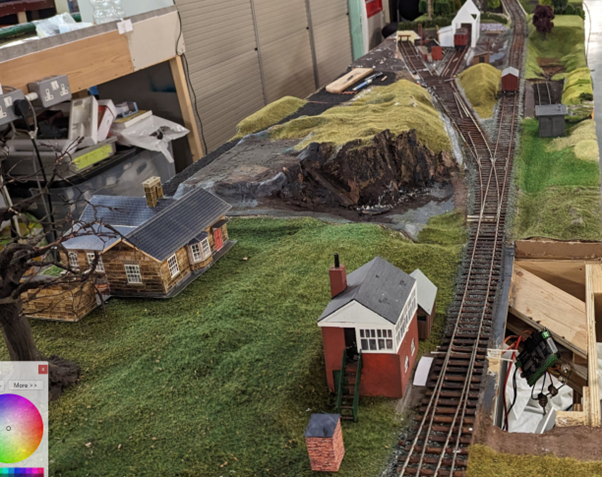
The station area will be quite flat, here is an early picture of the platform and building.

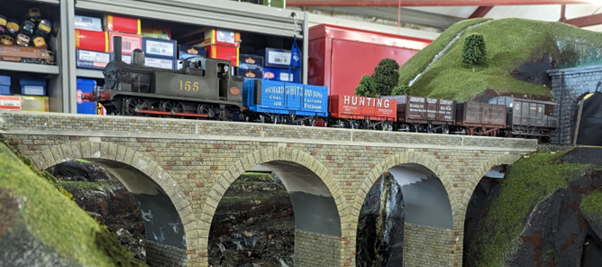
The club chairman approached me one night offering me a couple of viaducts, from a OO layout he was dismantling. I said yes, because you just never know when it might come in useful. What he gave me, was not really right for OO, I thought. So I built another baseboard.
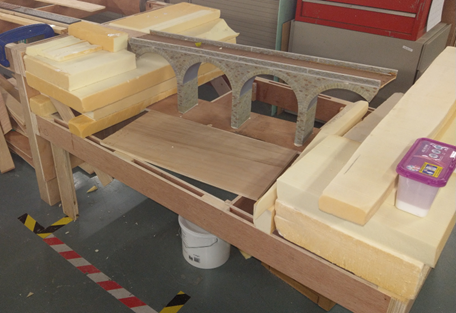
I placed the viaduct and using some of the Celotex started to sculpt some landforms. At this point one of my friends started to lend a hand to help with progress. The viaduct progressed along with other scenery.
Most of the sculpted landscape is built from Celotex glued and shaped to provide a non flat structure then covered with plaster of paris bandage.
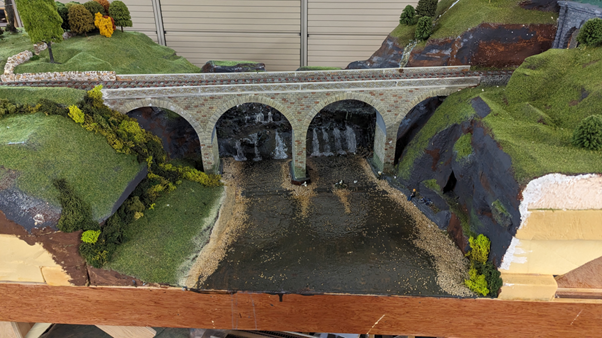
I started with some plater cast rocks, but added bark for the rock face.
Progress
So I have continued working on various areas, track (still not finished) scenery, buildings and rolling stock.
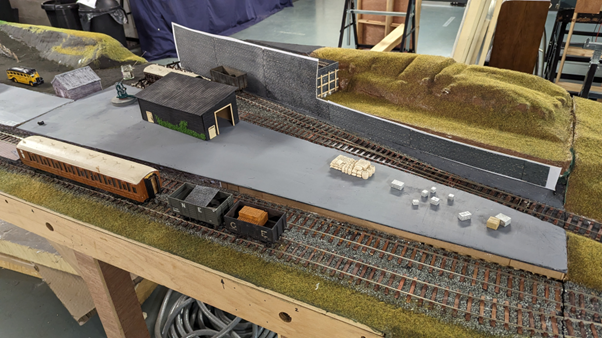
This is part of the station area.
I have started making some trees from wire, gluing the multi core cable together and the stripping the out as height is gained. The tree is then covered with a light brown (wood colour) coloured plaster. With a final coat of bark colour. This means that if a tree is chipped white will not show… I have yet to add foliage.
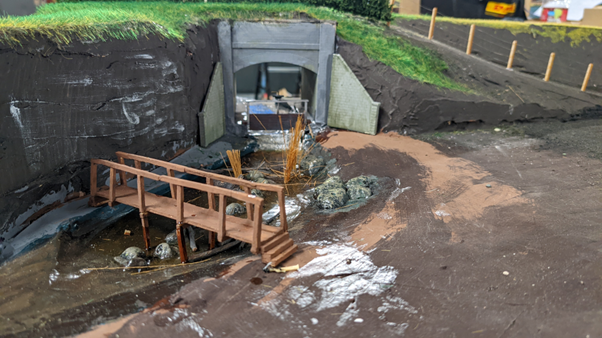
The starting of a river scene.
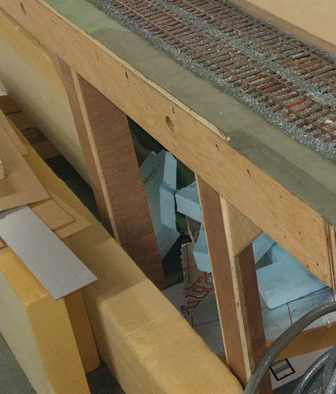
Dried lake/pond with negative elevation also showing the incomplete siding to the left, that I have been hiding from.
Points
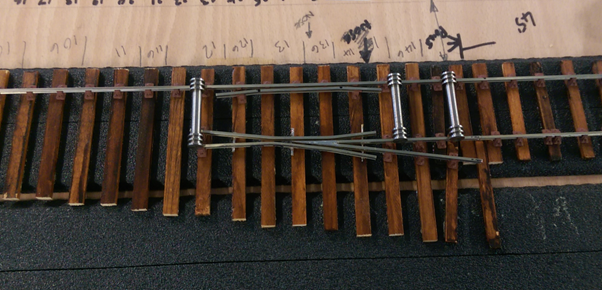
I have not shared the completion of points. Obviously, there is the need to file blades and connect them to the common crossing, then add stretchers and then make work.
Not having built points before nor really knowing where to buy certain pieces I needed I decided to build my own stretchers. I cut and shaped some brass to make the brackets that connect to the rails. These were then attached to plasticard strip.
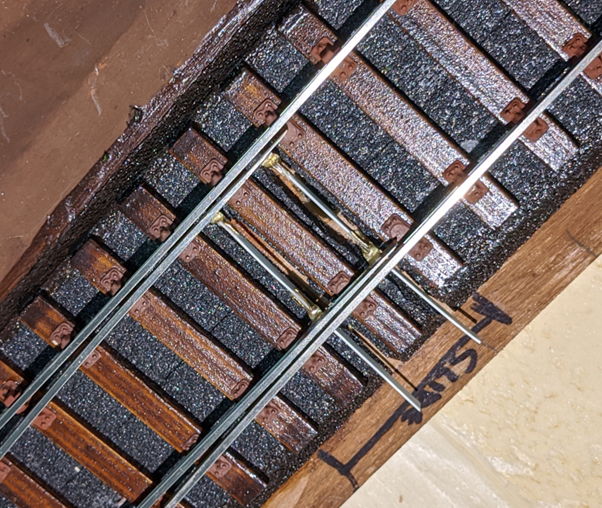
I added an extra bracket to the middle of one of the stretchers to allow the action to be added, I am using servos connected to Peco smart switches. This gives me programmable action to open and close the points. This works quite well, although the finished product is not as aesthetically pleasing as I might want but works.
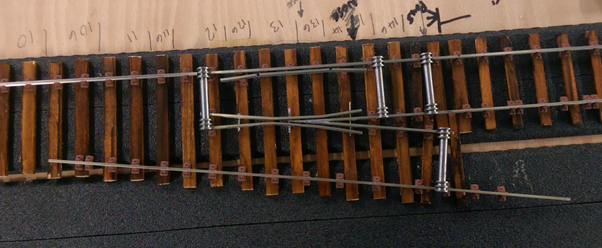
I have since found a kit that is more robust, and one of the points has been built with this kit, and the remaining points will also be built this way. Eventually, I will convert all of the points.
Current areas of development
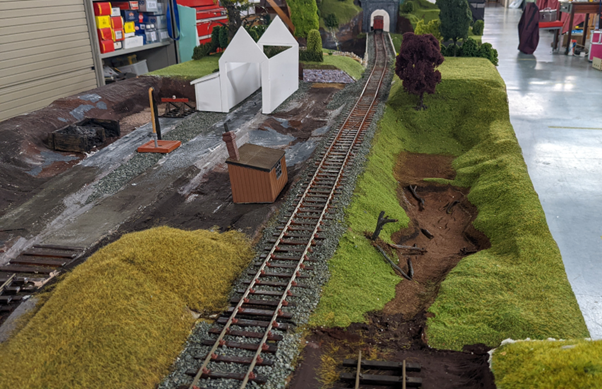
I have struggled with the track in the area of the engine shed (white temporary building), as I was trying to shoehorn the straight point template into a track plan that did not really work. I ended up lifting one siding to move it. And I spent about ten evenings at the club trying to build the common crossing for this point, which is actually slightly curved. I spent Good Friday working in this area, and have now managed to build and lay the common crossing, along with both corresponding rail, and even wired up one of the sidings. Check out the video, showing my 0-6-0 tank engine running right thought the point. Well until it falls of the end of the track, because I still have the blades to add. The other siding. May also need a bit of lifting and relaying as there is a bit of a kink at the board joint…
Once this area is finished I will finish the other two incomplete points, but this is just small items, then complete the DCC track wiring.
On the point of wiring, most of the track is wired and for the open day 2022 I had a train running from the viaduct through the two points into the station.
The future
There is still plenty to do, but I now have a deadline as Reeth is booked to visit the Glasgow exhibition in 2024. I have plenty of shelf queens that need to be built. However with the rise of R-T-R rolling stock I have converted some to S7 wheels already.
You will notice some coaches in the pictures, I picked them up cheap at an auction, they need bogies which I have built, just need to fit. These are the short term fill in until I build something better.
We all know that layouts are never finished, but I will have trains running over all of the rails and through all of the points. There will be signals, which I have ready. But there are still some decisions to be made. Point control, DCC, or levers? I have a plan for an ore loading area in the sidings behind the station, but I think this needs more thought as I would like to automate this, to load wagons, this, may not be done by 2024 😊
So either pop along to the open day in December in North Shields, or visit the layout in Glasgow and say hello, alternatively I am also on Western Thunder is you want to send a message.